
Buying Your First NFT on OpenSea (Ethereum/Polygon)

🎯 Course Objectives
By the end of this module, learners will:
Connect their MetaMask wallet to OpenSea
Browse and search for NFTs on OpenSea
Understand item listings and pricing
Complete a purchase or place a bid using ETH or MATIC
View their purchased NFT in their wallet

Primary Blockchains: Ethereum and Polygon
Tools/Platforms: OpenSea (web marketplace), MetaMask wallet
🧰 Step-by-Step Guide
1. Connect MetaMask to OpenSea
Visit OpenSea.io and click the wallet icon in the top-right corner.

Select "MetaMask" from the list of wallet options.
Authorize the connection by clicking "Next" and then "Connect" in the MetaMask pop-up.

Note: Ensure your MetaMask wallet is funded with ETH (for Ethereum) or MATIC (for Polygon) to make purchases.
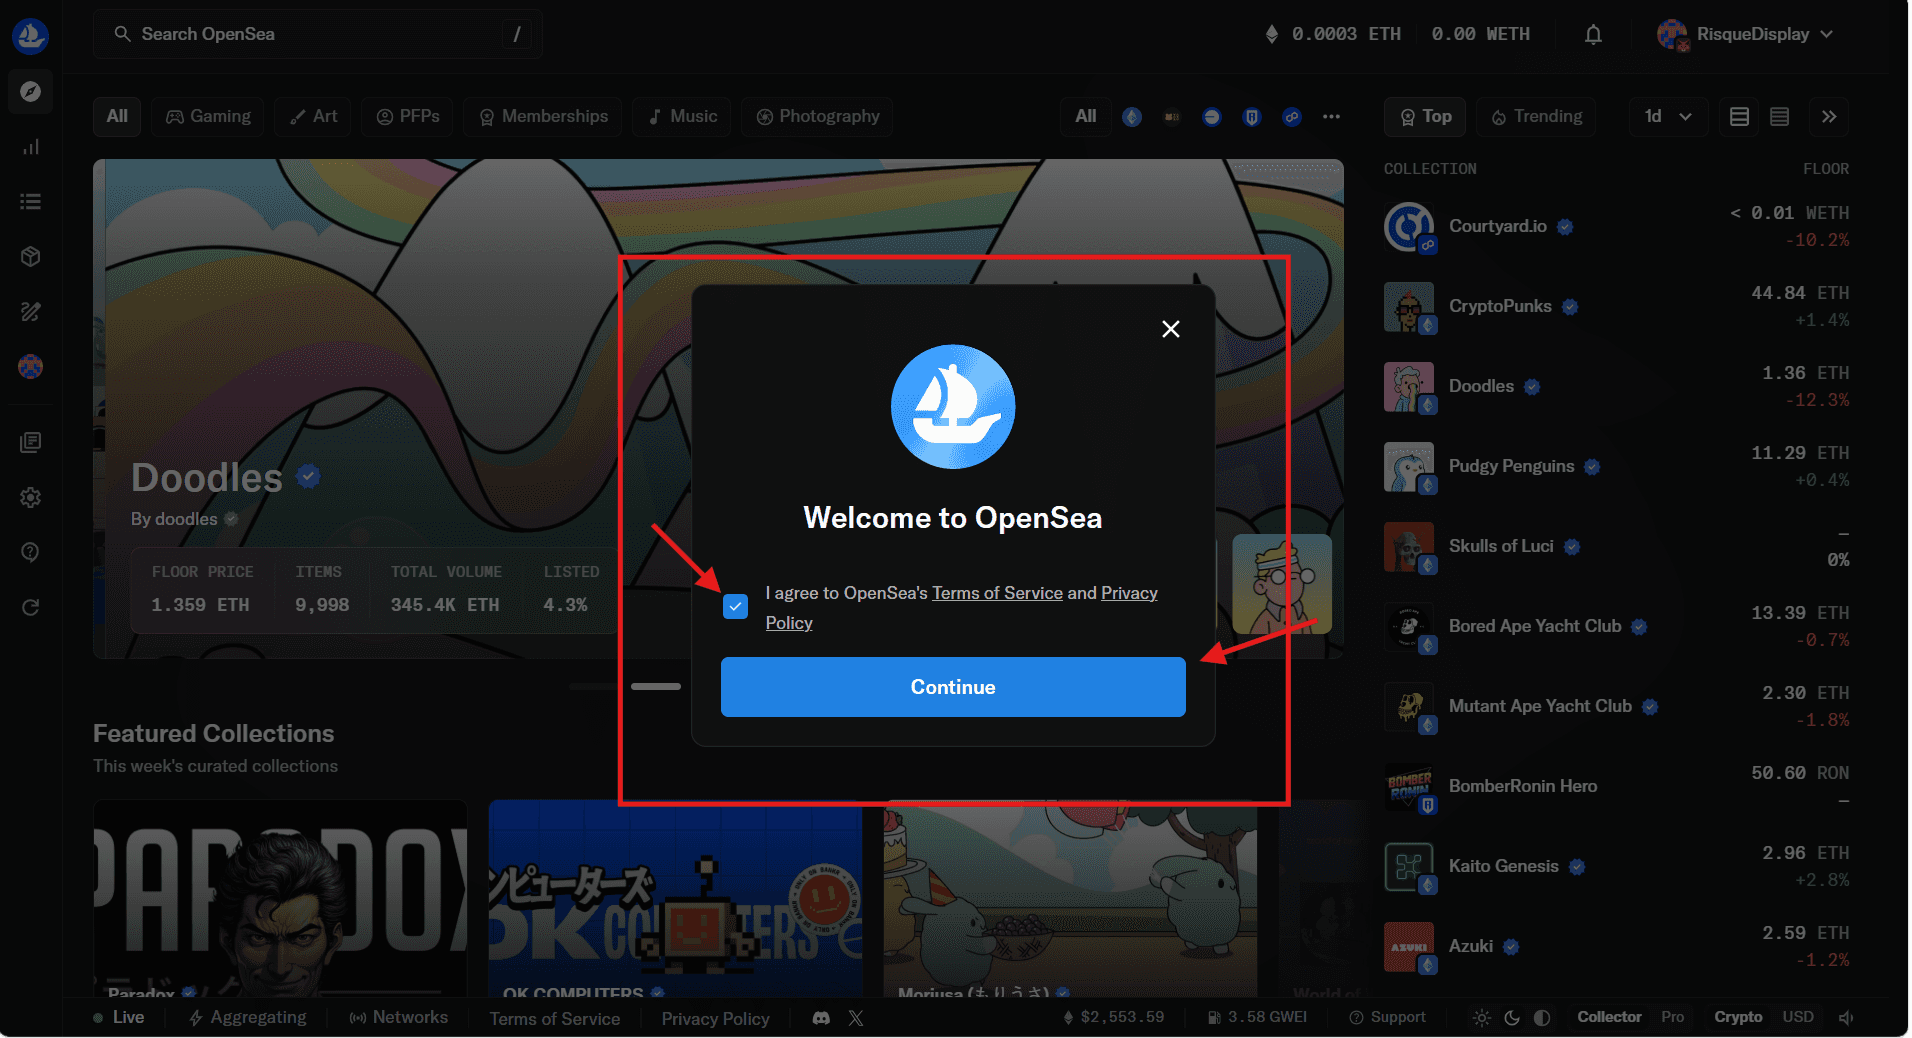
Then confirm the "Terms of Service" in your wallet.

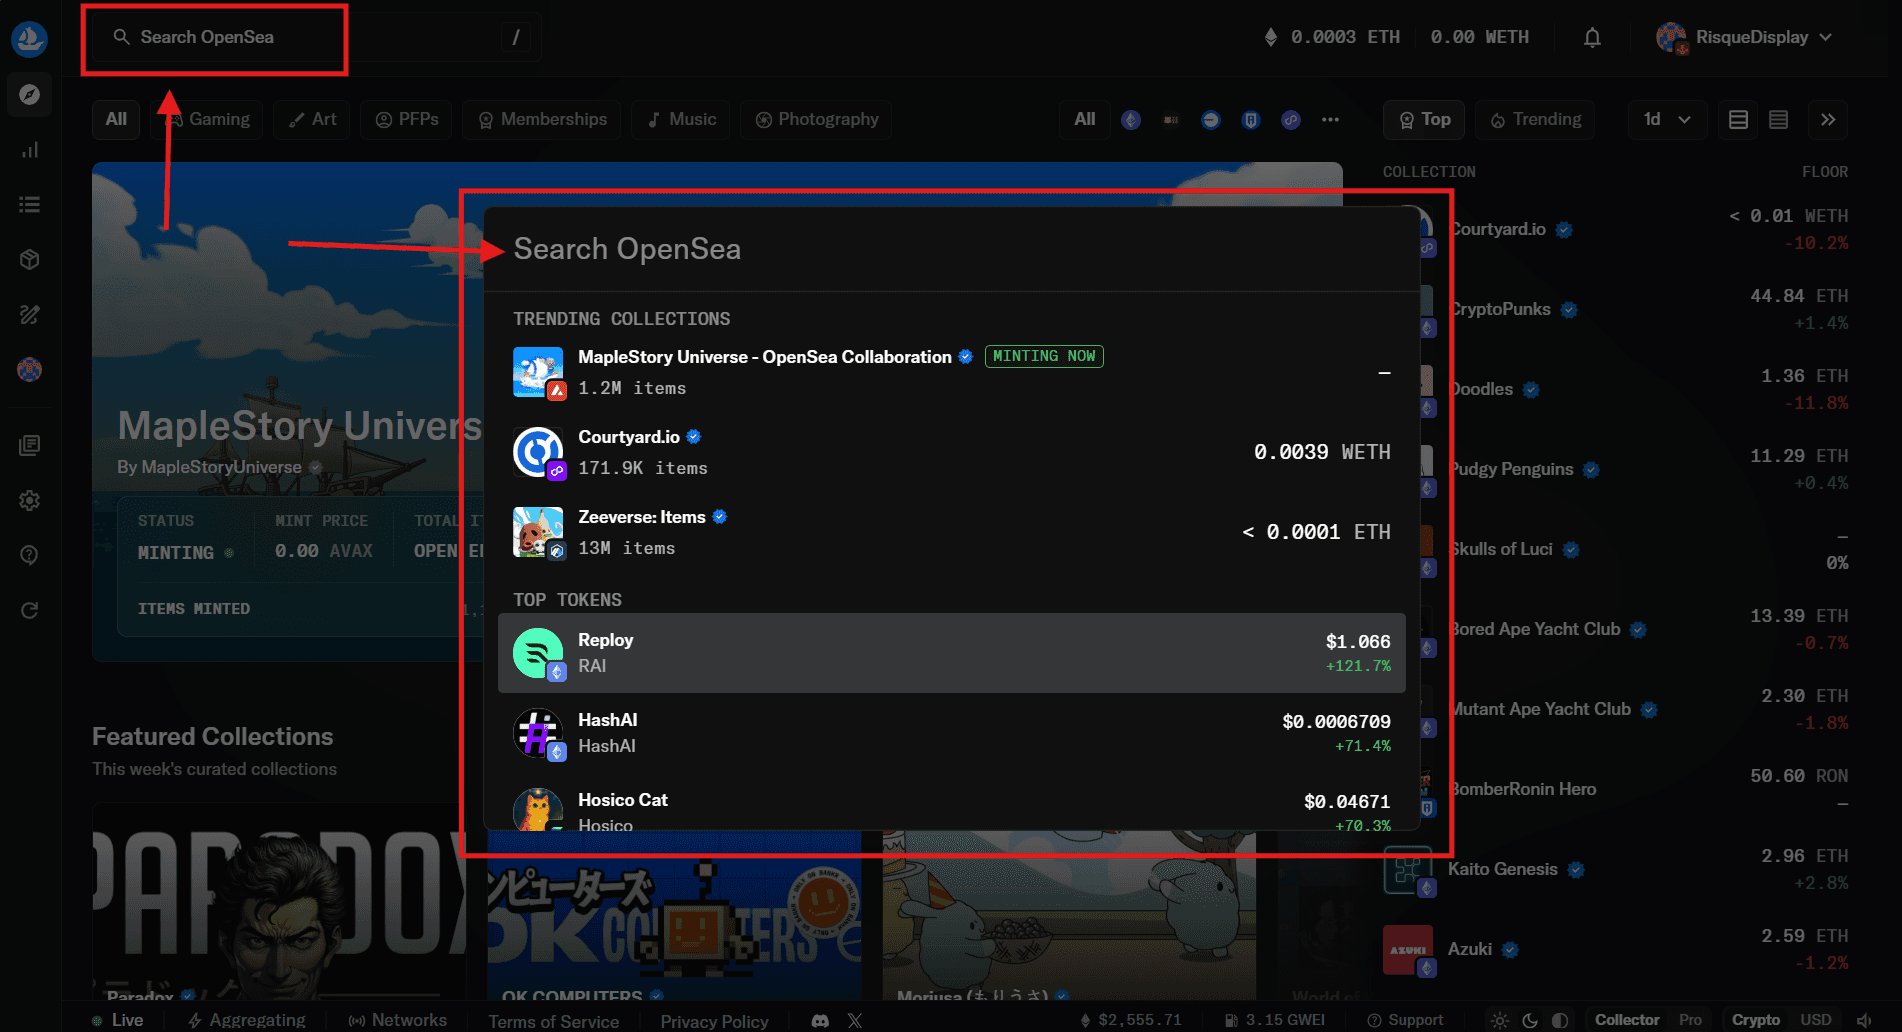
2. Browse and Search for NFTs
Use the search bar to find specific NFTs or explore collections by clicking "Explore" in the top menu.
Filter results by categories, price, blockchain (Ethereum or Polygon), and more to narrow down your options.
3. Understand Item Listings
Click on an NFT to view its details, including:
Price: Listed in ETH or MATIC.
Description: Information about the NFT.
Properties: Traits and attributes.
Creator and Ownership History: Track the NFT's provenance.
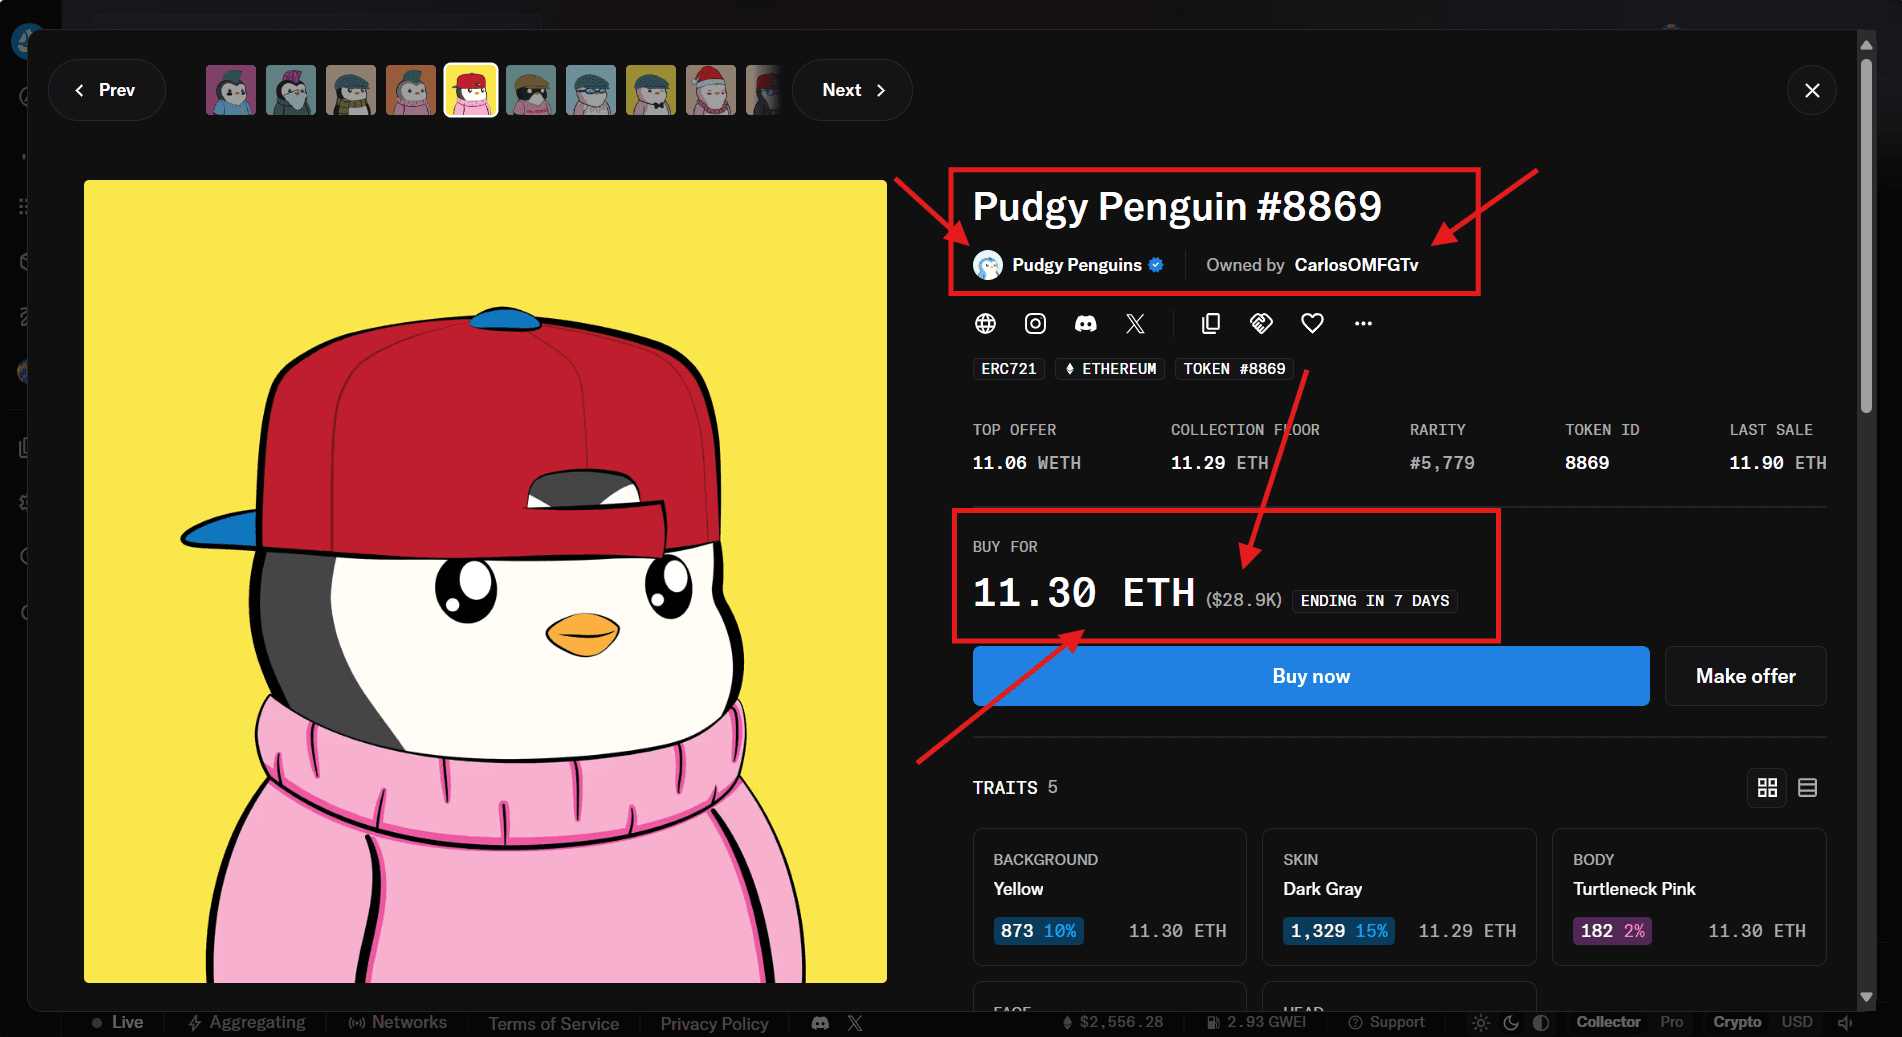
Tip: Look for verified collections (blue checkmark) to ensure authenticity.
4. Purchase or Place a Bid
Buy Now:
Click the "Buy Now" button.
Review the purchase details and click "Confirm Checkout."
MetaMask will prompt you to confirm the transaction. Review gas fees and click "Confirm."

Place a Bid:
Click the "Make Offer" button.
Enter your offer amount and expiration date.
Confirm the offer in MetaMask.

Note: Bidding may require WETH (Wrapped ETH). You can convert ETH to WETH within MetaMask.
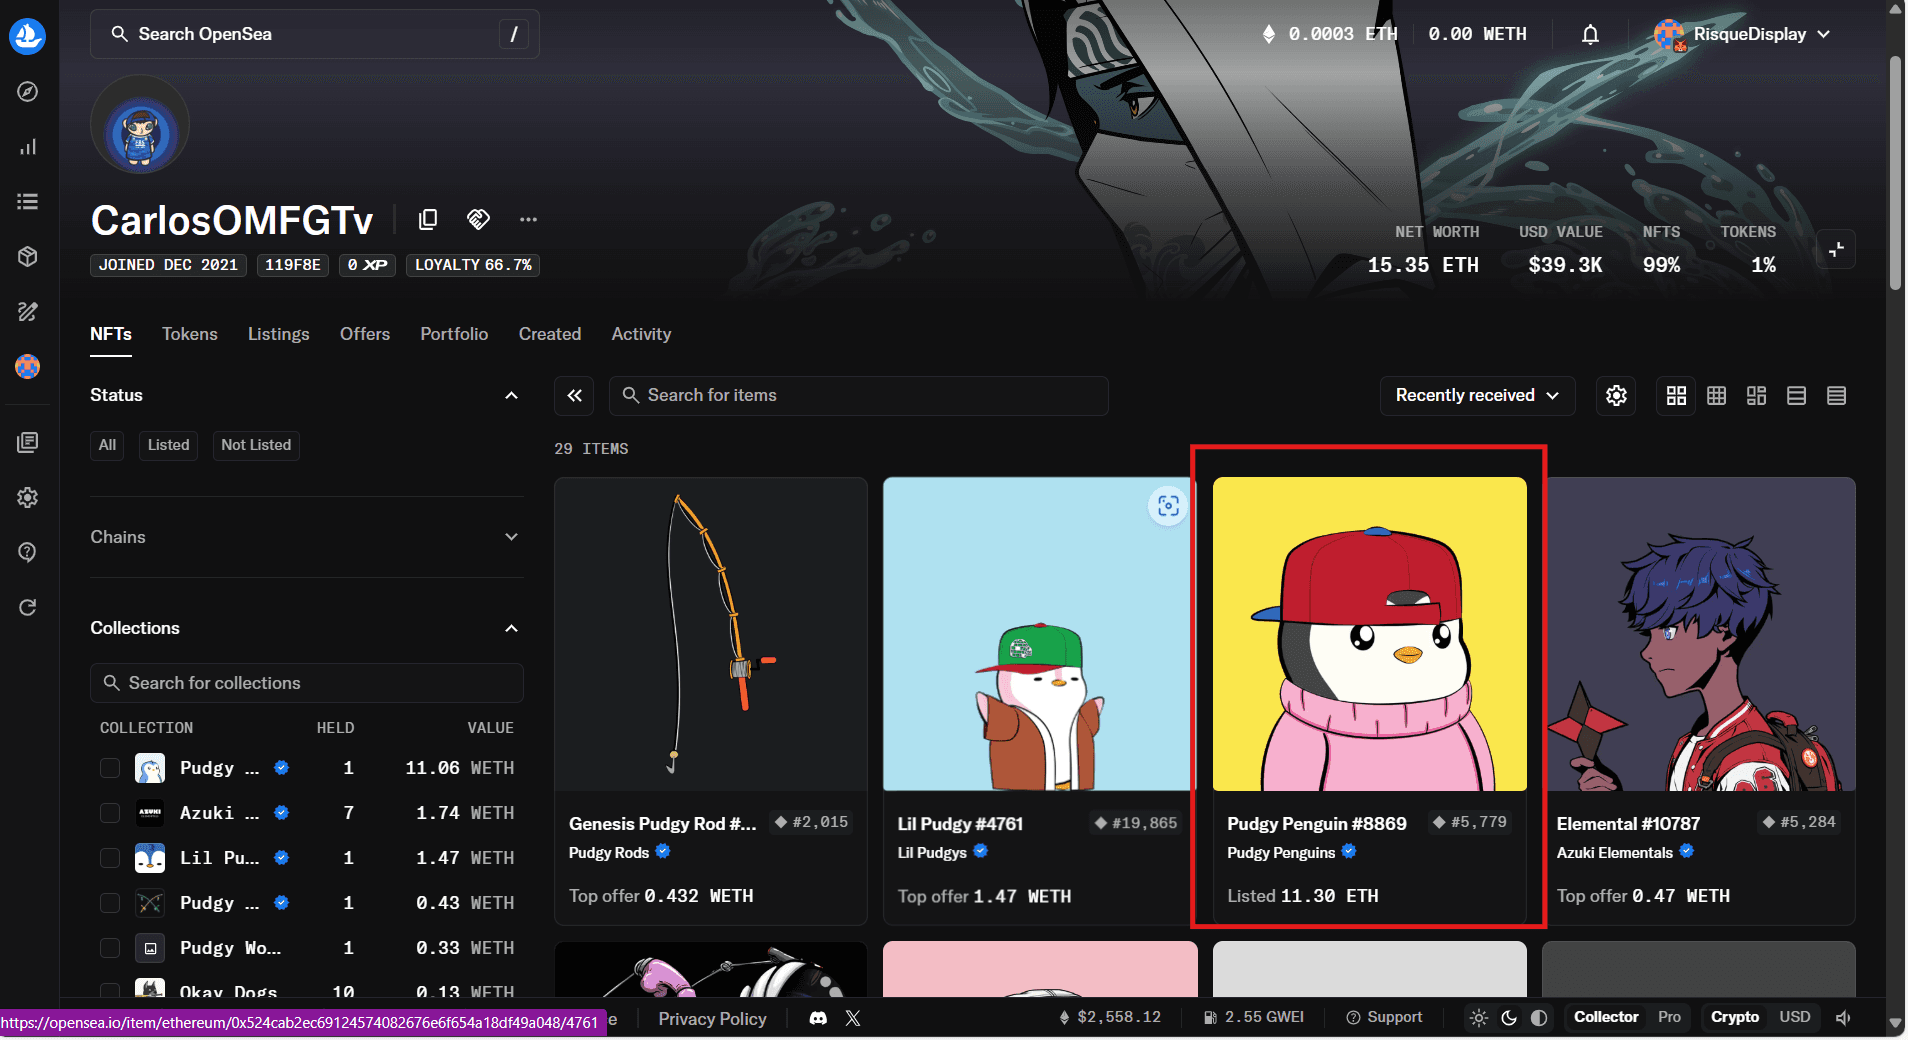
5. View Your Purchased NFT
After the transaction is confirmed, click on your profile icon and select "Profile."
Your newly acquired NFT will appear under the "Collected" tab
Disclaimer: The content on Pixel Palette Nation is for informational and educational purposes only. It is not intended as financial, investment, legal, or professional advice. Always conduct your own research and consult with qualified professionals before making any decisions. PPN and its affiliates assume no liability for any actions taken based on this information.
date published
reading time
3 min read


